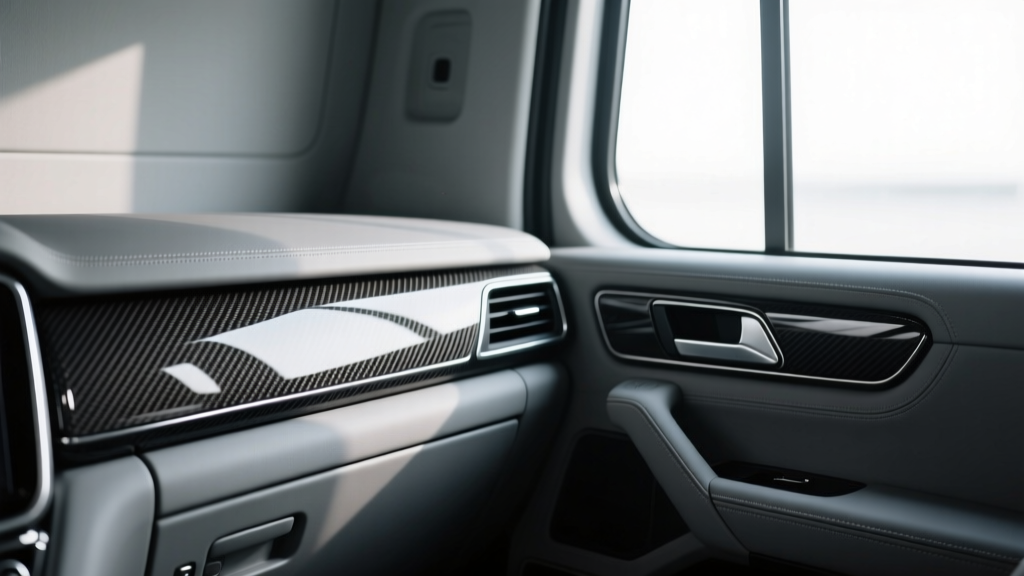
Commercial Vehicle Carbon Fiber Trim: Installation (2026)
Carbon fiber trim isn?t just for weekend sports cars anymore. In commercial vehicles?work vans, fleet trucks, service bodies, and heavy-duty pickups?it?s become a smart way to modernize a cabin that sees constant use. Whether you?re managing a fleet or simply spend long hours behind the wheel, interior upgrades can improve perceived quality, protect high-contact surfaces, and make the vehicle feel like a better place to work.
Part 1 covered the basics: choosing between overlays vs. replacement pieces, prepping your workspace, and understanding what ?real carbon fiber? actually means. Part 2 gets hands-on with the advanced portion of the install?wrapping more complex shapes, tackling high-wear areas (steering wheel surrounds, door pulls, center console edges), dialing in adhesion for commercial-duty conditions, and troubleshooting the issues that show up a week later when the van has baked in the sun and the cabin?s been wiped down twice a day.
If you want carbon fiber interior trim that looks factory and survives real-world commercial use, the details matter. Let?s get into the techniques pros use to make trim stay put and look right.
What?s Different About Commercial Vehicle Installs?
Commercial cabins live a harder life than most daily drivers. That affects both the product you choose and how you install it.
- More heat cycling: Fleet vehicles often idle, bake in sun, then cool down quickly?expanding and contracting trim pieces and adhesives.
- Frequent cleaning: Interior disinfectants, degreasers, and alcohol wipes can weaken cheap topcoats and lift edges over time.
- High-contact zones: Door pull cups, switch panels, and console corners get hit with rings, tools, and work gloves.
- Rough plastics: Textured ABS and grained surfaces can reduce bond strength unless prepped correctly.
Real-world example: A Sprinter-style work van with an overlay kit installed without adhesion promoter may look perfect on day one. After a week of summer heat and daily wipe-downs, the corners on the door switch bezels start curling. That?s not a ?bad kit? problem?it?s usually surface prep, edge sealing, and tape selection.
Before You Start: Tools and Materials That Make a Big Difference
Essential Tools
- Plastic trim tools (non-marring pry tools)
- Microfiber towels (lint-free)
- Isopropyl alcohol (70% for general cleaning, 90%+ for final wipe)
- Heat gun (preferred) or hair dryer (works, less control)
- Masking tape (low-tack painter?s tape)
- Razor blade or precision knife (for tape trimming)
- Small roller or felt squeegee (for pressing edges)
Adhesion and Protection Supplies
- 3M Adhesion Promoter 06396 (or equivalent): Especially helpful on textured plastics and edges.
- Quality automotive-grade double-sided tape: 3M VHB (commonly 5952 family) is a strong choice for interior trim overlays.
- Edge-sealing option (optional but helpful): Thin VHB strips, or a tiny amount of automotive trim adhesive in specific high-wear corners.
Product Recommendations: What to Buy for Commercial Use
Not all carbon fiber trim products are built the same. Here?s a practical comparison for commercial vehicle interiors:
-
Pre-cut carbon fiber overlays (ABS base with carbon finish)
- Best for: Fast upgrades, consistent fit, minimal disassembly
- Pros: Quick install, budget-friendly, widely available for vans/trucks
- Cons: Edge visibility, can lift if tape is weak or prep is rushed
-
Replacement trim pieces (full swap)
- Best for: Factory-like appearance, long-term durability
- Pros: Cleanest look, fewer edge concerns
- Cons: More expensive, more disassembly, part availability varies
-
Carbon fiber vinyl wrap (DIY wrap on stock trim)
- Best for: Custom patterns, larger surfaces, tight budgets with patience
- Pros: Flexible, replaceable, endless styling options
- Cons: Learning curve, durability depends on film quality and technique
Commercial-friendly tip: If the vehicle is shared by multiple drivers, prioritize materials with a tough clearcoat (if rigid trim) or a premium wrap film with a strong top layer (if wrapping). Cheaper gloss finishes tend to micro-scratch fast from keys, clips, and work gloves.
Step-by-Step: Installing Carbon Fiber Trim on Complex Areas (Part 2 Techniques)
Step 1: Test Fit Every Piece?And Mark Alignment
Before removing any tape liners, place each piece exactly where it will go.
- Dry fit the trim and check for interference with buttons, vents, shifter movement, and door handles.
- Use small strips of masking tape as alignment marks (top edge, left edge, reference corners).
- If multiple pieces meet (like a console surround), lay them all in position to check gaps and symmetry.
Practical tip: Sit in the driver seat and view the trim from normal driving angles. A piece can look centered standing outside the vehicle but appear crooked from behind the wheel.
Step 2: Clean Like You Mean It (Two-Stage Prep)
Commercial interiors often have silicone-based interior shine, hand oils, and cleaner residue. A quick wipe isn?t enough.
- Initial clean: Wipe with mild interior cleaner or diluted APC (avoid soaking switches).
- Final wipe: Use 90%+ isopropyl alcohol on a clean microfiber. Wipe until the towel no longer picks up grime.
- Focus on edges: Adhesive failures start at corners and seams.
Real-world example: Door switch panels on work trucks often have invisible grime in the grain texture. If you don?t scrub lightly with a microfiber and alcohol, the tape sticks to the contamination layer?not the plastic.
Step 3: Use Adhesion Promoter Strategically (Not Everywhere)
Adhesion promoter is a performance tool?especially for textured plastics and tight edges?but you don?t need to coat the whole panel.
- Apply promoter to perimeter zones: corners, thin edges, and any place where tape ends.
- Use a minimal amount; let it flash off per product instructions (usually a minute or two).
- Avoid getting promoter on visible surfaces where it could leave a sheen or mark.
Step 4: Warm the Cabin and the Trim for Better Bond
Temperature affects bond strength more than most DIY installers realize.
- Ideal install temperature: 70?85�F (21?29�C)
- If it?s cold, run the heater and warm the trim pieces indoors.
- Use a heat gun lightly to warm the substrate (the factory trim) and the overlay tape?warm, not hot.
Commercial tip: If the vehicle lives outdoors, plan your install for mid-morning. Early morning panels can hold condensation and cold-soaked plastic reduces initial tack.
Step 5: The ?Hinge Method? for Perfect Placement
This technique helps you place trim precisely without smearing tape or landing crooked.
- Position the piece using your alignment marks.
- Apply a strip of masking tape along one side, creating a ?hinge.?
- Flip the piece open on the hinge, peel a small portion of the tape liner, and fold the liner tabs outward.
- Flip back down, align carefully, then pull the liner tabs while applying light pressure.
Why it works: You?re controlling placement before the adhesive fully contacts, reducing the chance of a one-shot mistake.
Step 6: Pressure, Then Heat, Then Pressure Again
For VHB-style tapes, pressure activates the adhesive. Heat helps it flow into texture.
- Press firmly across the entire piece for 30?60 seconds.
- Warm edges gently with a heat gun (keep it moving).
- Press edges again?especially corners and thin sections.
- Use a felt squeegee or roller to avoid finger marks and uneven pressure.
- Spend time on edges: Most failures start with edge lift.
Step 7: High-Wear Areas?Extra Reinforcement Where It Counts
Commercial vehicles have specific zones that take abuse. Treat them differently.
Door Pull Cups and Grab Handle Surrounds
- Add thin VHB strips to any area that?s ?floating? or not supported.
- Use adhesion promoter around the perimeter.
- Make sure the piece doesn?t interfere with handle travel.
Center Console Corners and Knee Contact Points
- Choose trim with a slightly rounded edge if available; sharp edges lift more easily.
- Consider matte or satin carbon fiber finishes?gloss shows scuffs from tools and belt clips faster.
Dash Trim Near Vents
- Dry-fit with the HVAC running to confirm the trim won?t rattle or buzz.
- Don?t block airflow channels or vent adjustment movement.
After-Install Cure Time and Care (So It Stays Put)
Most adhesive tapes build strength over time. Treat the first 24?72 hours as a ?cure window.?
- First 24 hours: Avoid heavy cleaning, don?t pick at edges, minimize aggressive pulling on door handles where trim was added.
- First 72 hours: Avoid extreme heat if possible (direct sun for hours) and avoid chemical cleaners on the new trim.
- Cleaning best practice: Use a mild interior cleaner and a soft microfiber. Skip harsh solvents, citrus degreasers, and strong alcohol wipes on glossy finishes.
Fleet tip: If the vehicle is shared, leave a small note for drivers: ?New trim installed?avoid harsh wiping for 72 hours.? That one step prevents a lot of edge lifting caused by someone scrubbing on day one.
Common Mistakes to Avoid
- Installing over interior dressing: Silicone shine products are adhesive killers. If the surface feels slick, clean again.
- Rushing alignment: Many overlay pieces won?t tolerate repositioning once the tape grabs.
- Skipping edge pressure: A trim piece can be 95% bonded and still fail because one corner wasn?t pressed properly.
- Overheating with a heat gun: Too much heat can warp ABS overlays or damage nearby panels. Warm gradually and keep the gun moving.
- Using bargain tape: Weak double-sided tape is the #1 reason overlays lift in commercial use. If a kit includes thin, no-name tape, upgrade it.
- Ignoring interference: A piece that rubs a button, shifter, or door handle will eventually peel or crack.
Troubleshooting: When Trim Lifts, Rattles, or Doesn?t Sit Flat
Issue: Edge Lift After a Few Days
- Cause: Contamination on the surface, weak tape, insufficient pressure, or no promoter on textured edges.
- Fix: Carefully lift the affected edge (don?t crack the piece), clean with alcohol, apply adhesion promoter, add fresh VHB tape, warm and press firmly.
Issue: Rattling or Buzzing on Rough Roads
- Cause: A section of trim is floating without adhesive contact.
- Fix: Remove and add tape to support points. For small gaps, thin foam tape can also dampen vibration (avoid thick foam that changes fitment).
Issue: Misalignment Around Buttons or Vents
- Cause: The piece was placed slightly off, or the panel has manufacturing variance.
- Fix: If newly installed, you may be able to remove with gentle heat and re-tape. If it?s fully cured, replacement tape and a full re-install is usually cleaner than forcing it.
FAQ: Commercial Vehicle Carbon Fiber Trim Installation
Will carbon fiber trim interfere with airbags or safety systems?
It can if you install overlays on or near airbag seams, airbag covers, or panels designed to break away. Avoid placing trim on airbag-marked areas and follow the vehicle?s safety labeling. If you?re unsure, choose pieces designed specifically for your make/model/trim level.
Is real carbon fiber better than ABS overlay trim for a work truck or van?
Real carbon fiber (or carbon fiber over a rigid substrate) can look more premium, but durability depends on clearcoat quality and edge design. For commercial use, a high-quality ABS overlay with strong tape can be more practical and easier to replace if damaged.
What?s the best finish for a commercial interior: gloss or matte carbon fiber?
Matte or satin hides fingerprints and micro-scratches better?ideal for fleet vehicles and daily work use. Gloss looks striking but shows scuffs faster, especially around door pulls and console edges.
Can I install carbon fiber trim in cold weather?
Yes, but you?ll need to control temperature. Warm the cabin, warm the trim pieces, and use a heat gun lightly to promote adhesion. Cold-soaked plastic reduces initial tack, which is when edges tend to fail later.
How long does the tape take to fully bond?
Many automotive acrylic foam tapes reach a strong initial bond quickly, but build toward full strength over 24?72 hours. During that time, avoid harsh cleaners and avoid stressing edges.
Do I need to remove factory trim panels to install overlays?
Usually no?most overlay kits are designed to install on top of existing trim. Replacement kits typically require panel removal. For complex areas, removing a panel can actually make installation cleaner if it gives you better access and pressure control.
Next Steps: Make Your Install Look Factory and Last Like It
If you?re upgrading a commercial vehicle interior with carbon fiber trim, focus on three things: prep, edge bonding, and cure time. Take an extra 20 minutes to clean thoroughly, use adhesion promoter on edges, and apply pressure the right way. That?s the difference between a sharp-looking cabin for years versus corners lifting after a heat wave.
Ready to keep going? Consider mapping out your interior upgrade plan:
- Start with high-impact visuals: dash and center stack accents
- Reinforce high-wear areas: door pulls, console corners, switch panels
- Choose finishes based on usage: matte for durability, gloss for show
- Set a maintenance routine: gentle cleaning products and microfiber towels
Thanks for reading?explore more interior trim installs, material comparisons, and detailing-friendly upgrades right here on carinteriormix.com.